This example is for an external, brush-cleanable AC/air-handler trap with manufacturer-designated cleanout caps, such as the applicable EZ-Trap 100-series design. It is NOT a furnace's internal condensate trap, condensate pump, mini-split drain or glued pipe without service access.
Your condensate-trap comic
Conceptual drawings: cap position and drain routing vary. Follow the cleaning label on your exact trap. The short outlet in step 5 represents the drain's existing discharge point—do not cut or disconnect piping to copy the picture.
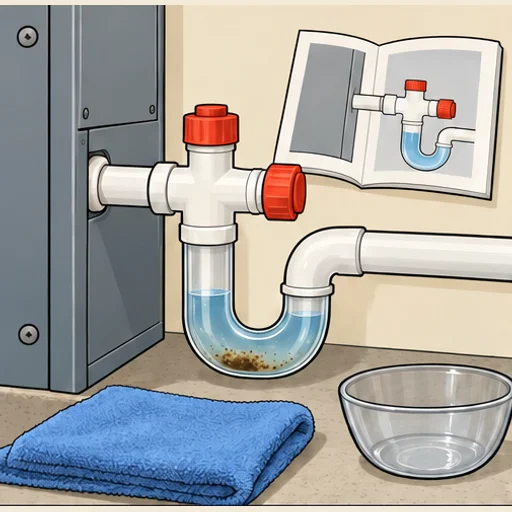 01
Match the trap to its instructions
Identify the model and service ports before opening anything. This cap-and-brush sequence does not apply to EZ-Trap 150, 160, 250 or 260, or to a design requiring float-switch removal.
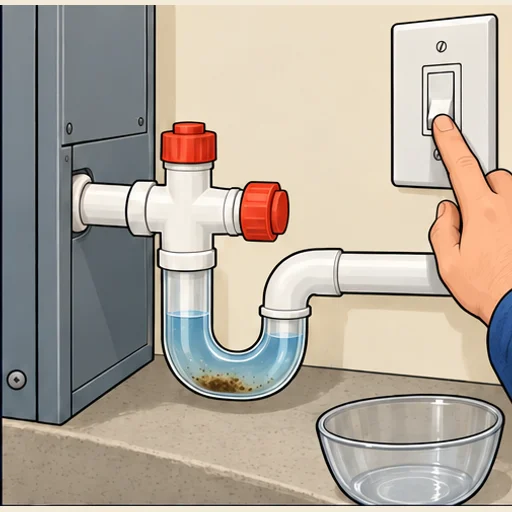 02
Shut down and catch drips
Follow the equipment's power-off procedure from a dry location. Put a towel and shallow container below the accessible trap. Leave cabinet panels and electrical parts closed.
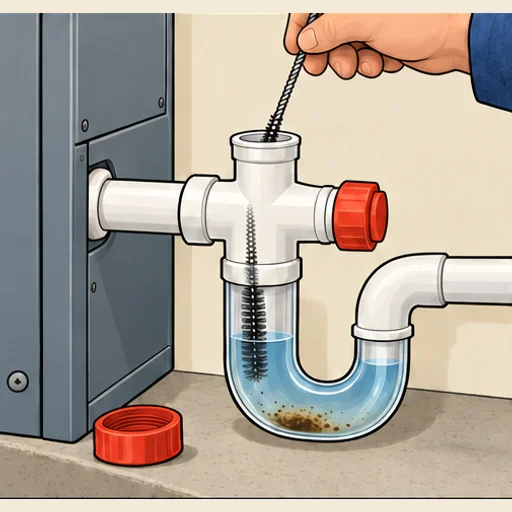 03
Brush the trap passage
Open the designated upper cleanout cap. Gently pass the supplied flexible brush down through the trap, then withdraw it. Do not force a blockage or use a rigid wire.
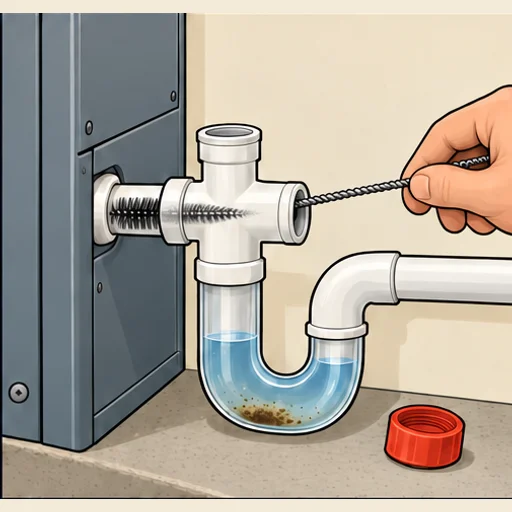 04
Clear the pan-outlet passage
Where the cleaning label specifies it, open the second cleanout and brush toward the drain-pan outlet. Remove the brush, then reseat that cap airtight before a water test.
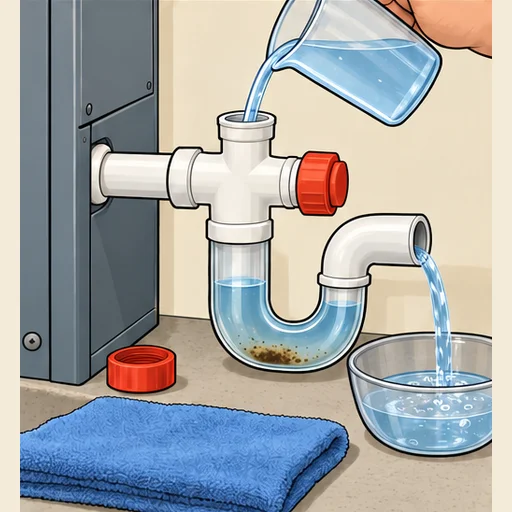 05
Test with clean water
With the second cap closed, slowly add clean water through the approved upper opening. Check the existing discharge and joints. Stop immediately if water backs up or leaks. Leave the required water seal in the trap.
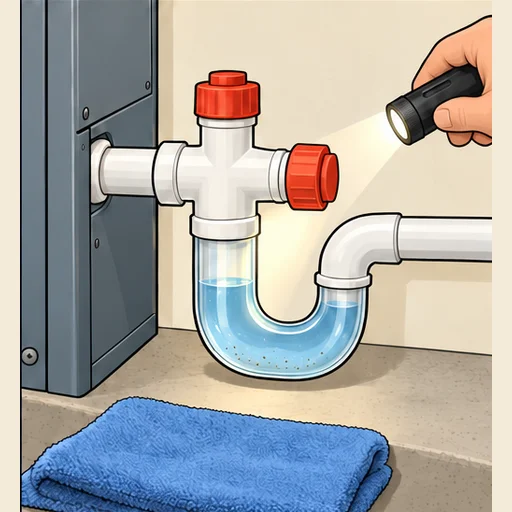 06
Close, then check operation
Refit the upper cap and all original service closures. Restore operation only after drainage is clear and joints are dry; watch for leaks. Never bypass a float switch to make the system run.
Illustrations explain the sequence; your equipment manual controls the actual access, parts and procedure.
A useful homeowner task—when the access is designed for it
The water collected during cooling needs a clear route out. A transparent, serviceable trap lets you see buildup and reach it through intended cleanouts. Routine cleaning is different from solving an active leak or redesigning the drain.
Gather the trap's instructions, its specified flexible brush, gloves, a towel, a shallow container and a small jug of clean water. First locate the existing drain discharge and establish how you can verify flow without taking piping apart.
When this is not the right procedure
Stop for water near electrical equipment, an unsafe attic or ceiling, cracked fittings, ice, a drain you cannot identify, or a blockage that resists gentle cleaning. If you cannot verify drainage, keep the affected system off and request service.
Do not open a furnace combustion-condensate trap or neutralizer using this guide. Do not remove a float assembly, cut glued joints, pressurize the drain or pour household drain opener into it. Chemical choices, if any, belong to the exact equipment and drain instructions—not a universal bleach-or-vinegar recipe.
What a successful clean looks like
The test water drains without backing up, service caps are restored, the trap retains its water seal, and joints stay dry during operation. A one-time water test does not prove that every downstream section or safety switch works. A returning clog or recurring leak needs investigation, not repeated flushing.
Sources & further reading
General guidance informed by the sources below. Equipment-specific instructions take priority; accessory buying criteria are HVAC PM recommendations, not manufacturer approval.